
TL;DR
Moving your AI rig into a closet or another room is the most effective way to reduce noise. Combining placement, proper ventilation, and strategic acoustic treatment makes a huge difference—way more than just foam panels.
Ever wonder why some closet setups sound almost professional while others are a muffled mess? The secret isn’t just in buying foam panels or sealing gaps. It’s about understanding how sound travels and where to put your efforts for real silence.
This article reveals the most practical steps to tame noise — from smart placement and ventilation to effective acoustic treatment — so you can focus on your work without the constant hum or roar of your rig. Whether you’re recording vocals, running AI models, or just want a quieter space, these tips will change your game.
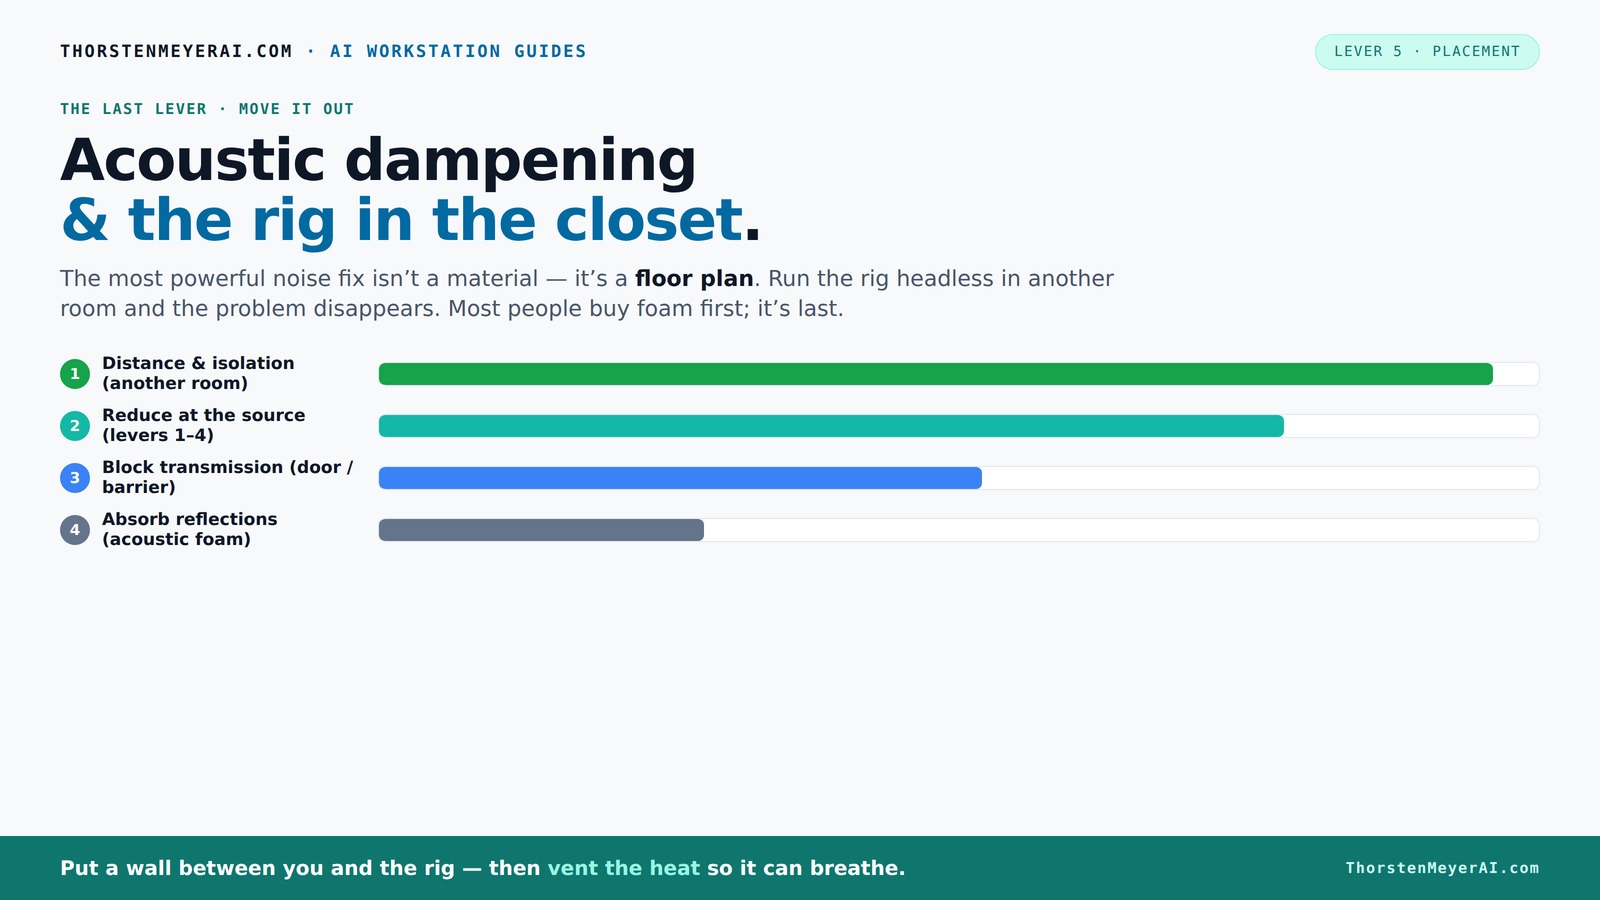
Acoustic dampening
& the rig in the closet.
The most powerful noise fix isn’t a material — it’s a floor plan. A rig you can’t hear because it’s in another room beats any amount of foam. Tap the approaches in Part 1 to see what actually works.
(another room)
(levers 1–4)
(door / barrier)
(acoustic foam)
Contain the noise, not the heat
Key Takeaways
- Moving your rig into another room or closet is the most effective noise reduction method.
- Proper ventilation is critical — don’t trap heat, or your rig will overheat and throttle.
- Targeted acoustic treatment—focusing on reflection points and corners—beats covering every surface.
- Sealing gaps around doors and outlets is a simple but powerful way to cut noise leaks.
- Bass traps in corners are essential if you notice low-frequency rumble or boominess.

Momcozy Universal Stroller Organizer with Insulated Cup Holder Detachable Phone Bag & Shoulder Strap, Fits for Stroller Like Uppababy, Baby Jogger, Britax, BOB, Umbrella and Pet Stroller
- Structured Organizer with Multiple Pockets: Internal multi-functional partition design
- Insulated Cup Holders: Includes 2 insulated cup holders
- Large Capacity Storage: Fits essentials like phone, wallet, and more
As an affiliate, we earn on qualifying purchases.
Why Moving It Is the Biggest Noise Hack You Can Do
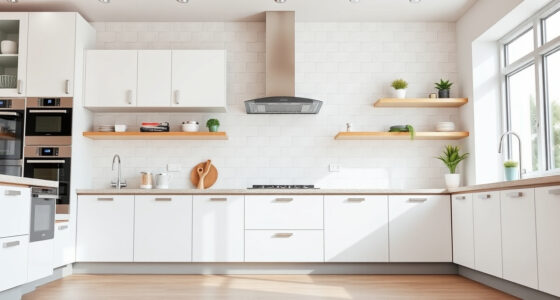
The most effective way to silence your rig? Put it in another room. Distance is king. A GPU tower in a closet or basement will be whisper-quiet on your desk. When the machine isn’t right next to you, its noise becomes irrelevant.
For example, a friend placed his AI server in the laundry room, connected via a reliable Ethernet cable, and kept his workspace silent. The roar of the fans became an afterthought, even during intensive training runs.
This approach works because the sound’s journey is cut short. Instead of fighting noise, you just make it disappear into another space where it doesn’t bother you. For more on acoustic treatment, see acoustic dampening tips.
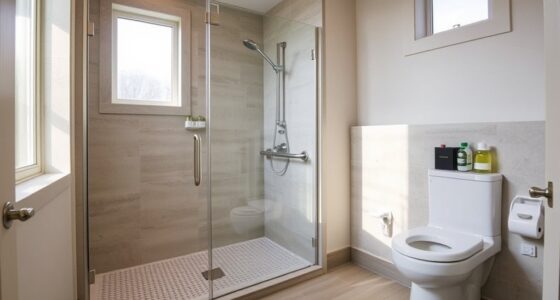
How to Make a 'Rig in the Closet' Work Without Cooking It
Placing a high-load machine in a closet isn’t magic — it needs proper ventilation. Without airflow, heat builds up fast. A GPU running 600W can turn a closet into an oven in minutes.
To keep your system cool, install passive vents or a quiet exhaust fan. For serious setups, consider a purpose-built soundproof cabinet with ducted airflow. These combine acoustic treatment with cooling, preventing overheating while keeping noise down.
For example, one creator used a custom cabinet with a thermostat-controlled fan, maintaining a steady 70°F even during intense use. Ventilation is non-negotiable. Without it, your silence turns into a fire hazard.
Acoustic Dampening vs. Sound Isolation — Why Both Matter
Acoustic dampening and sound isolation are two sides of the same coin. Dampening reduces echo and reflections inside the closet, making recordings clearer. Isolation stops sound from leaking out or in.
Think of it like this: foam panels inside your closet soften the space and absorb internal reflections, which can cause muddiness or echo in recordings. Meanwhile, sound isolation involves sealing gaps and adding barriers to prevent sound from escaping or entering, which is crucial if you want to keep noise contained or prevent external noise from seeping in. Neglecting either aspect can compromise your setup—poor dampening leaves your recordings muddy, while poor isolation allows noise to escape or intrude, defeating the purpose of your efforts. Achieving the right balance ensures your space not only sounds good internally but also doesn’t disturb others or pick up unwanted external noise.
Understanding why both are necessary helps in making tradeoffs. For instance, overly focusing on dampening without sealing gaps might improve internal clarity but still allow noise to escape, defeating the purpose of a quiet space. Conversely, excessive sealing without internal dampening can trap internal reflections, leading to muffled recordings. The key is to balance both, optimizing your space for clarity and containment simultaneously, which often involves layered solutions—like combining foam panels with weatherstripping and bass traps—ensuring your setup is both acoustically sound and neighbor-friendly.
Placement Matters: Treat Reflection Points, Not Every Surface
In small spaces like closets, strategic placement of acoustic treatment makes a huge difference. Instead of covering every inch, focus on key reflection points—mainly the wall behind the mic, ceiling, and corners. Learn more about placement strategies.
For example, a vocal artist found that hanging a few thick panels at reflection points around her closet improved clarity instantly. Bass traps in corners helped tame low-frequency buildup, common in tight spaces.
Research shows that targeted treatment outperforms random coverage, especially when space is limited. Use a mirror to find reflection points — where sound bounces directly into your mic — and treat those areas first. Prioritizing these spots ensures your sound is clearer without wasting resources on treating areas that don’t significantly impact sound quality. This focused approach maximizes your acoustic investment, making your small space much more effective for recording or AI work.
Bass Traps & Corner Treatment — When You Need Them
Bass traps are essential when low frequencies build up and cause boominess or rumble. In small, parallel-walled closets, low-end energy can resonate and muddy your recordings. See bass trap options for small spaces.
Installing bass traps in corners absorbs these heavy, low-frequency waves. Thicker panels (around 4 inches) are better for bass control, while thinner foam mainly tackles mid and high frequencies.
For example, a musician added corner traps, and suddenly vocals sounded clearer, with less muddiness. If you notice a thumping or boomy sound, low-frequency treatment is a must. Without bass traps, low-end buildup can make your recordings sound muddy and indistinct, reducing clarity and professionalism. Proper low-frequency management ensures your audio remains tight and balanced, especially in small, reflective spaces.
Sealing the Closet Door & Gaps — Don’t Let Sound Escape
Gaps around the door, outlets, and vents are the weakest links in your soundproofing chain. Sealing these with weatherstripping, draft stoppers, or acoustic gaskets is a game-changer.
For example, sealing the door edges with foam tape reduced sound leakage by over 50% in a test setup, making a noticeable difference in how much noise escaped.
Remember, even small leaks compromise your entire effort. A tight seal around the door and any openings keeps sound from sneaking out and reduces echo inside. Proper sealing not only prevents noise from escaping but also enhances the effectiveness of your acoustic treatment by maintaining a controlled internal environment. It’s a simple step that yields significant improvements in noise containment and overall sound quality.
Floor Treatments: Rugs, Carpets, and Isolation Pads
Floor reflections can bounce sound back up, adding to echo and muddiness. Rugs and carpets help absorb these reflections.ns but don’t block sound transmission.
In a tiny closet, adding a thick rug reduces flutter echo. For more isolation, placing a rubber mat or anti-vibration pads under your rig cuts down on structure-borne noise.
For example, placing a dense rubber mat under a noisy GPU tower cut the mechanical hum from transferring into the floor, making the room feel much quieter. These floor treatments are particularly important in small, reflective spaces where sound can bounce multiple times, creating a muddy or boomy sound. While they don’t block sound from escaping, they significantly improve internal acoustics, making recordings clearer and reducing internal echo and flutter echo.
When Are Bass Traps Necessary? Low-End Buildup & Rumbling
Bass traps become critical when low-frequency waves cause boomy, muddy sounds. If your closet setup sounds muffled or boomy, low-end treatment is the fix.
In a small, parallel-walled closet, low frequencies bounce and resonate, creating a rumbling that’s hard to record or listen to clearly. Installing bass traps in corners stops this from happening.
For example, a home studio with low-end problems added bass traps, and the difference was night and day — the sound opened up, clarity improved, and recordings became more professional. Without bass trapping, low-end energy can dominate your mix, making it sound muddy and indistinct. Properly implemented bass traps help achieve a balanced frequency response, ensuring clarity across the spectrum and preventing low-frequency resonances from muddying your recordings.
Reflection Filters & Portable Solutions for Apartment Studios
In rental spaces, full acoustic treatment isn’t always possible. Reflection filters, moving blankets, and portable panels are your best options. They’re easy to move and remove, perfect for renters.
For instance, a voice actor uses a portable reflection filter and a thick blanket draped behind her mic, dramatically reducing echo and background noise without permanent changes.
These solutions won’t eliminate all noise but significantly improve clarity and reduce echo in small, confined spaces. They are practical, flexible, and cost-effective, allowing you to improve your sound environment without permanent modifications, which is especially important in rental situations where structural changes are not feasible.
What’s Realistically Achievable in a Closet Setup
You won’t turn a closet into a soundproof vault overnight. Expect noise reduction of around 20-30 dB with targeted treatment and sealing. It’s enough to make your workspace much quieter but not silent.
For example, sealing gaps and adding absorption reduced external noise pickup during vocal recordings by half, which was enough for professional-sounding results.
Adjust expectations: a closet setup improves your recordings and reduces echo, but complete isolation requires more extensive modifications or moving your rig elsewhere. Recognizing these limitations helps set realistic goals and guides you to implement the most effective, practical solutions for your space, balancing effort and benefit.
Frequently Asked Questions
What is the difference between soundproofing and acoustic treatment?
Soundproofing blocks sound from entering or leaving a space, usually through barriers and sealing gaps. Acoustic treatment reduces reflections, echoes, and reverberations inside the room, making recordings clearer. Both are important but serve different purposes.
Where should I place panels in a closet vocal booth?
Focus on reflection points: the wall behind you, ceiling directly above, and corners for bass traps. Use a mirror to identify where sound bounces directly into your mic and treat those areas first for best results.
Do I need bass traps in a small closet?
Yes, especially if you notice low-frequency rumble or boominess. Bass traps in corners absorb these heavy, resonant waves, making your recordings sound clearer and more balanced.
How thick should acoustic panels be for a closet?
Thicker panels (around 4 inches) are better for controlling low frequencies, while 2-inch panels work well for mid and high frequencies. The choice depends on your space and specific issues.
Will moving blankets or rugs actually work?
These help reduce echo and flutter within the space but don’t block sound transmission. They’re useful for improving clarity and reducing internal reflections, especially in rental or temporary setups.
Conclusion
In the end, the biggest wins come from smart placement and strategic treatment, not just buying foam panels. Think of your closet as a tool, not a final fix—use it to isolate, ventilate, and absorb only what really matters.
Imagine a tiny, quiet studio where your AI runs smoothly, your vocals shine, and your neighbors remain blissfully unaware of your midnight sessions. That’s what a well-planned closet setup can achieve. Now go build your perfect quiet space.