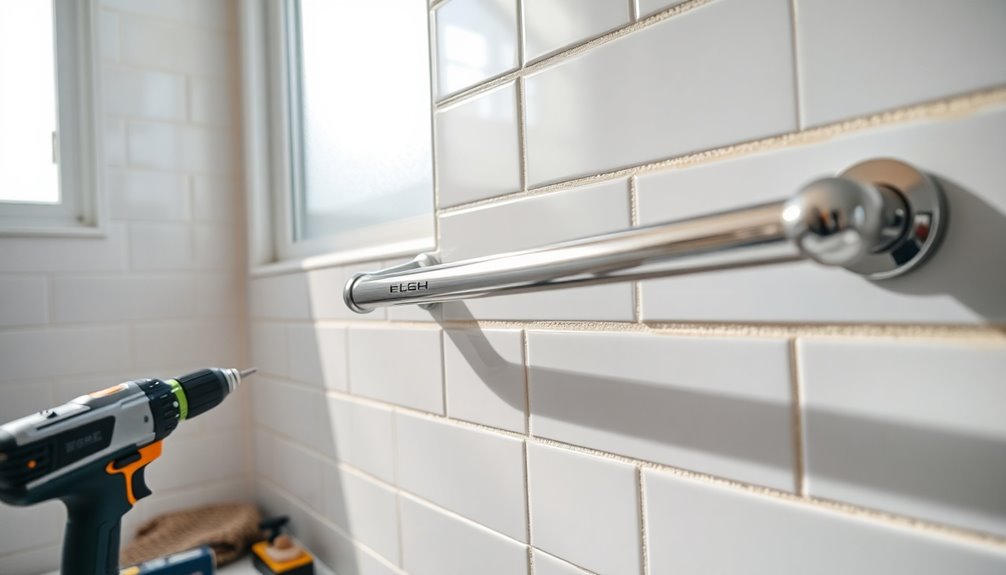

Installing grab bars in your bathroom enhances safety considerably. First, gather the right tools like a drill, stud finder, and stainless steel screws. Locate wall studs to secure the bars properly and choose the best placement based on user needs. Confirm bars are mounted at waist height and test their stability once installed. If you follow these steps, you'll set up your grab bars effectively and make your bathroom safer. Learn more about proper installation techniques and tips.
Key Takeaways
- Use a stud finder to locate wall studs for secure mounting, aiming for a height of 33 to 36 inches from the floor.
- Choose grab bars that are at least 1¼ to 2 inches in diameter and can support at least 250 lbs when properly installed.
- Install horizontal grab bars inside the shower or tub, positioning them 6 to 10 inches above the rim for optimal support.
- Test the grab bar's stability by applying strong force after installation to ensure secure attachment before regular use.
- Consider consulting a physical therapist for personalized advice on the best placement based on individual mobility needs.
Tools and Materials Needed for Installation
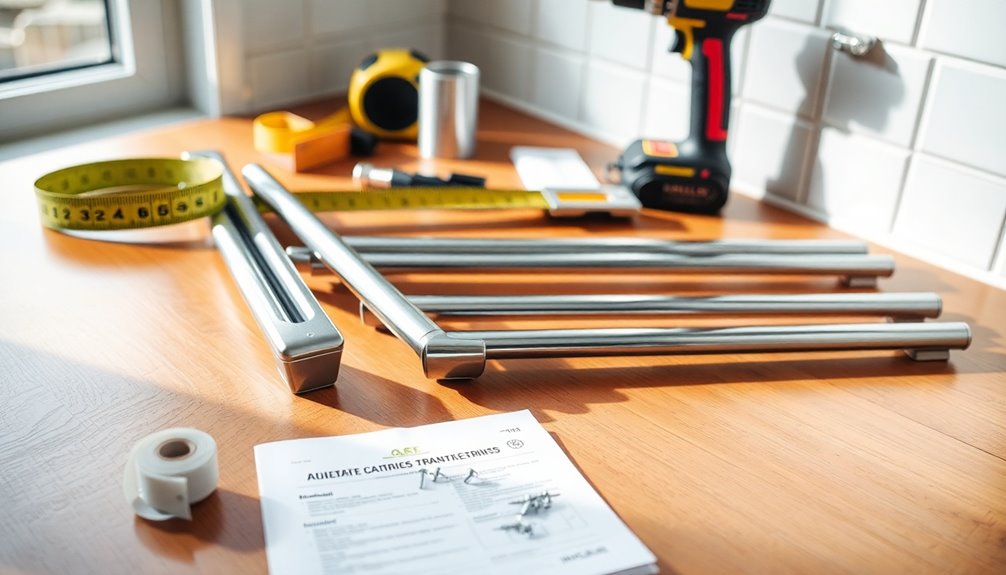
When you're ready to install grab bars in your bathroom, having the right tools and materials is essential for a safe and effective setup.
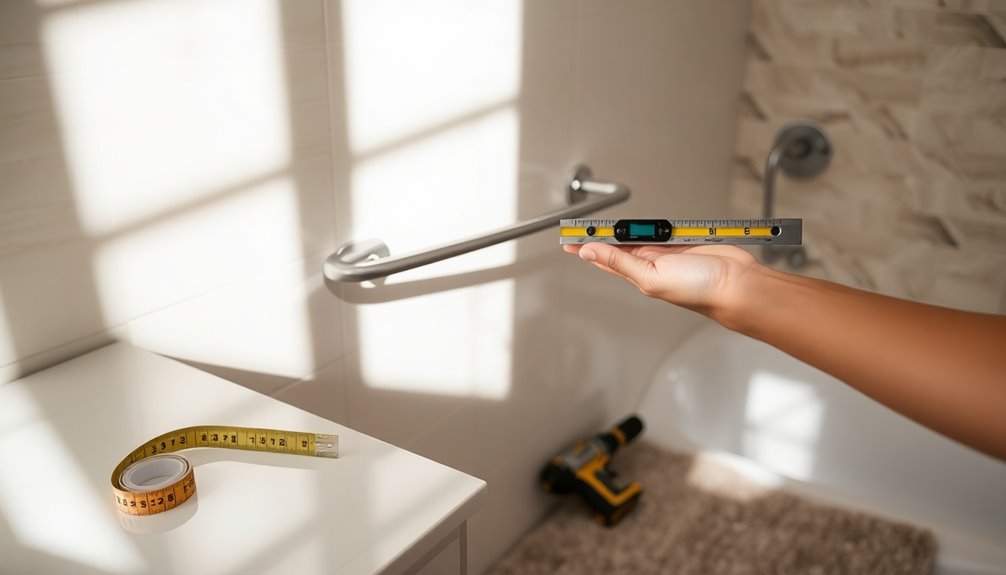
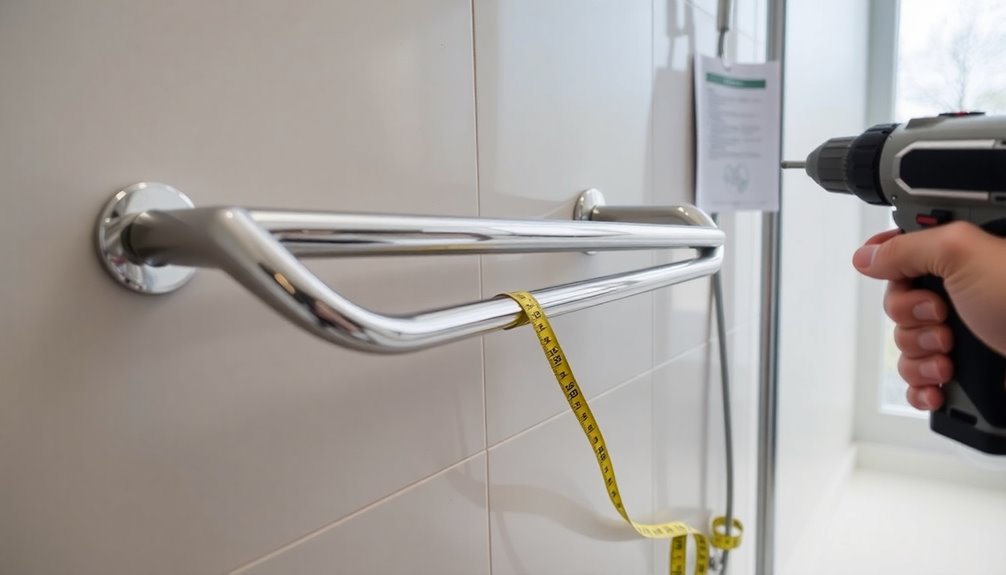
Start with a sturdy drill/driver equipped with appropriate bits for the installation. A stud finder is vital for locating wall studs, ensuring you secure the grab bars properly. You'll also need a tape measure to accurately position the bars for ideal use.
If you can't find studs, wall anchors are necessary for a secure installation. Don't forget to wear safety equipment, like eye protection, to guard against debris.
Using painter's tape to mark the desired mounting positions on the wall can help you align everything perfectly before drilling.
Prioritize safety for a successful installation.
Considerations Before Installing Grab Bars
Before you start installing grab bars, it's crucial to evaluate several factors that can impact their effectiveness and safety.
Here are some key considerations:
- Always mount grab bars into wall studs or use appropriate anchors to maintain structural integrity.
- Confirm the mounting position—vertical, horizontal, or diagonal—based on user needs for maximum accessibility.
- Avoid mounting on acrylic tub and shower surrounds, as flexing can compromise stability.
- Choose grab bar finishes that match your bathroom hardware and consider non-slip options for added safety.
Choosing the Best Placement for Grab Bars
When choosing the best placement for grab bars, think about the entry and exit points of your shower or tub.
Consider your specific needs and how you move to make certain the bars provide the support you require.
Also, pay attention to stud locations to guarantee the grab bars are securely anchored for maximum safety.
Entry and Exit Points
Choosing the best placement for grab bars in your bathroom can greatly enhance safety during entry and exit from a tub or shower. Here are key considerations:
- Position vertical grab bars near the tub edge, 32 to 38 inches above the floor.
- Install horizontal grab bars inside the shower or tub, 6 to 10 inches above the rim for stability.
- Consider diagonal grab bars for those using shower seats, with the bottom around 18 inches from the floor.
- Always adhere to ADA guidelines, ensuring a 1 ½ inch clearance between the grab bar and wall for a secure grip.
Before you install grab bars, simulate entry and exit to determine the best locations based on comfort and safety.
User-Specific Needs
Understanding user-specific needs is essential for determining the best placement of grab bars in your bathroom. Start by evaluating the individual's mobility needs and abilities.
For safety access, install vertical grab bars 32 to 38 inches above the floor at shower or tub entries, while horizontal bars should be 36 to 38 inches high for easy reach during use. If the user has a bath chair, position angled grab bars about 18 inches above the tub for easier transfers.
Confirm there's at least a 1 ½ inch clearance between the grab bar and the wall to allow for a secure grip. It's wise to consult physical therapists for personalized recommendations on grab bar placement tailored to the user's specific requirements. Additionally, consider the principles of Law of Attraction to foster a positive mindset about the user's independence and safety in the bathroom.
Stud Location Considerations
Locating the right studs in your bathroom walls is essential for securely installing grab bars. Use a stud finder to pinpoint wall studs and mark their centers. This guarantees that your grab bars are mounted firmly, maximizing strength and safety.
Here are key placement tips:
- Position grab bars 33 to 36 inches above the finished floor.
- For tubs or showers, install them 6 to 10 inches above the rim or floor.
- Maintain at least 1 ½ inches of clearance between the grab bar and the wall for a comfortable grip.
- If wall studs aren't accessible, consider using toggle bolts or adding blocking between the studs to secure the mounting flange effectively.
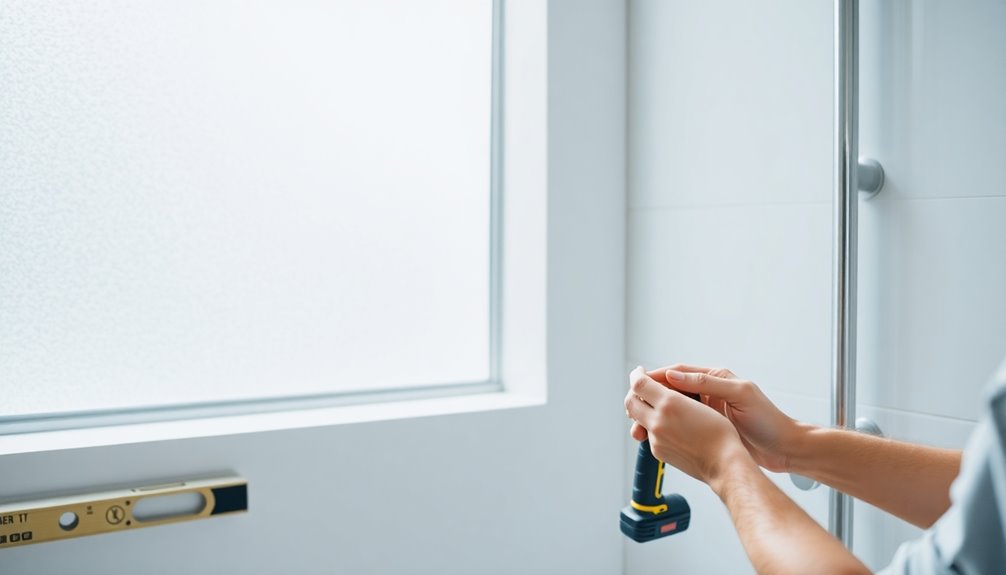
Installing Grab Bars on Wall Studs
Installing grab bars securely on wall studs is essential for ensuring safety and stability in your bathroom.
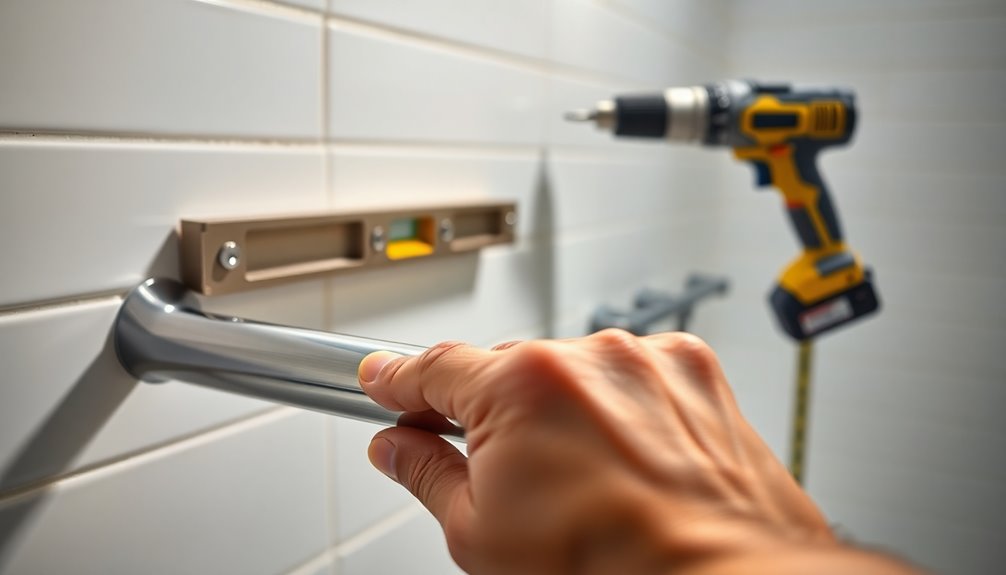
Start by locating the studs with a stud finder, marking the desired height with painter's tape—aim for 33 to 36 inches above the floor.
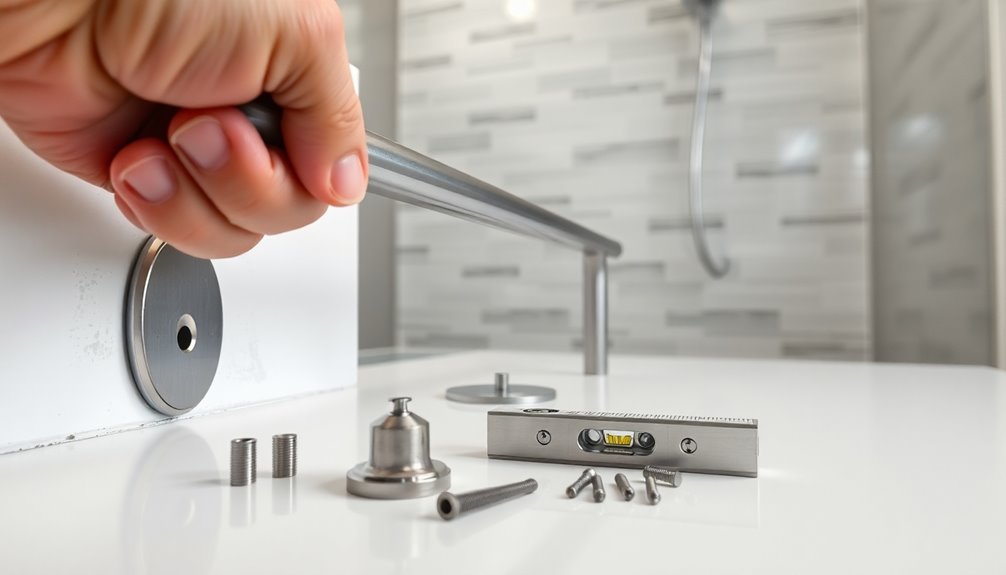
When installing a grab bar, drill pilot holes into the wall studs, ensuring they're deep enough for screws to penetrate at least 1 inch.
Use stainless steel screws, preferably No. 10 or 12, for a strong attachment. Avoid smaller or drywall screws, as they won't provide adequate support.
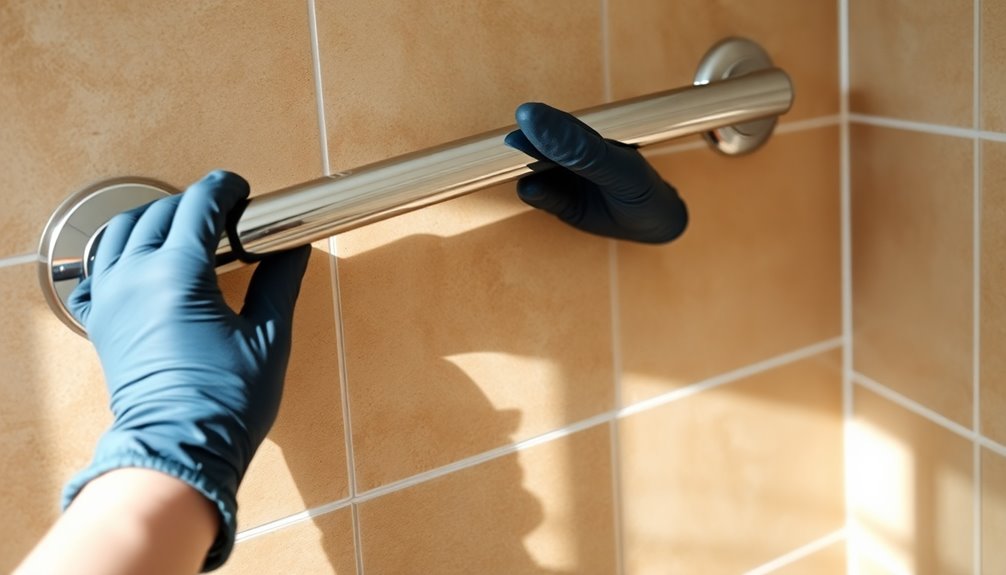
Once you've mounted grab bars, test their holding power by giving them a solid yank to confirm they can safely bear weight before regular use.
Installing Grab Bars Using Wall Anchors
Securing grab bars with wall anchors can be a practical solution when wall studs aren't available. Follow these steps to guarantee a safe installation:
- Mark flange hole openings with painter's tape.
- Drill 1/2-inch holes for toggle-bolt anchors.
- Insert the toggle-bolt anchors into the holes.
- Fasten the mounting flanges of the grab bar securely.
After drilling holes, remove any loose drywall paper for a secure fit.
Position the metal channels of the toggle-bolt anchors vertically for maximum strength.
Once you've attached the bar with screws, apply equal pressure to secure it firmly.
Finally, test the strength of the grab bar by pulling on it to confirm it can support the required weight safely.
Securing the Grab Bar
Once you've installed the grab bar using wall anchors, the next step is to verify it's securely fastened.
Start by pre-drilling pilot holes using the marked screw locations, ensuring they align with wall studs or the anchors for stability. Use No. 10 or 12 stainless steel screws, making sure the screws penetrate at least 1 inch into the stud for maximum strength.
If your wall's tiled, insert wall anchors flush with the surface before you install the grab bars to prevent any movement. Once secured, tighten the screws firmly.
To protect against water damage, apply caulk around the edges of the grab bar flanges to create a watertight seal. This verifies that grab bars provide extra security in your bathroom.
Testing the Stability of Installed Grab Bars

After verifying your grab bar is securely installed, it's important to test its stability to confirm safety. Here's how to effectively conduct your test:
- Wait 1-2 hours for any caulking to dry.
- Have a helper nearby for safety.
- Apply a strong pull on the grab bar.
- Check all screws and mounts for tightness.
During the test, apply maximum force to make certain the grab bar can support weight without any movement or give.
If you notice any instability, reassess your installation method. Make sure it's securely anchored into wall studs or appropriate wall anchors.
This step is vital for your safety and peace of mind when using the grab bar in your bathroom.
Additional Considerations for Grab Bar Installation

When installing grab bars, think about the specific needs of the user, like their height and reach.
Choose materials that can withstand moisture and offer strong support for safety.
Finally, make certain you secure the bars properly to guarantee they can handle weight without compromising stability.
Assessing User Needs
How can you guarantee that grab bars meet the specific needs of users? To assure safety and stability, you'll need to assess various factors before installation.
Consider these key points:
- Evaluate the individual's mobility and stability needs.
- Consult a physical or occupational therapist for tailored advice.
- Measure the user's height for ideal grab bar placement.
- Identify wall studs for secure mounting, supporting at least 250 pounds.
Position grab bars at waist level, usually between 33 to 36 inches from the floor.
After installation, test the grab bar by applying force to confirm its stability.
This thorough approach will help you create a safer bathroom environment that caters to the user's unique requirements.
Choosing Appropriate Materials
Choosing the right materials for grab bars is essential for guaranteeing safety and longevity. Start by selecting grab bars that can support at least 250 lbs when properly installed.
Opt for stainless steel for mounting, as it resists rust and corrosion—avoid drywall screws that mightn't provide adequate support. Confirm the grab bar's finish complements your bathroom fixtures, and consider non-slip options for added grip safety.
The mounting method needs careful consideration too; use wall anchors for hollow walls, toggle bolts for drywall, or directly mount on studs for solid support.
Finally, pay attention to the grab bar's height and diameter, aiming for a range of 1¼ to 2 inches for various users' grip strengths and needs.
Ensuring Secure Installation
Making certain a secure installation of grab bars is vital for user safety, so always mount them directly into wall studs whenever possible.
If you can't find studs, use heavy-duty wall anchors like toggle bolts or WingIts.
Follow these key steps for a successful installation:
- Verify grab bars can support at least 250 pounds.
- Maintain a clearance of 1 ½ inches between the grab bar and the wall.
- Use the right drill bits for tiled walls to avoid cracking.
- Perform a stability test by applying weight to confirm secure installation.
These considerations are significant, especially during bathroom renovations, to guarantee your grab bar provides the stability and safety you need.
Community Feedback and Success Stories

Safety and independence are paramount for many individuals, and community feedback highlights the transformative impact grab bars can have in bathrooms. Many users report that grab bars provide essential support, greatly reducing the risk of falls.
Community testimonials emphasize the importance of following clear installation instructions and seeking advice from physical or occupational therapists for ideal grab bar placement. This tailored approach leads to improved stability and greater peace of mind.
DIY success stories often showcase how replacing old or inadequate grab bars with modern designs not only enhances safety but also complements bathroom decor.
Resources for Further Assistance
If you need extra help with your grab bar installation, consider hiring a professional contractor who knows bathroom modifications.
You can also find helpful online installation videos or attend local home improvement workshops for hands-on guidance. Many communities offer resources specifically aimed at assisting homeowners in making their spaces safer and more accessible. For those looking to implement senior safety home modifications, these workshops can provide valuable insights and practical tips. Additionally, online forums and social media groups can connect you with others who have successfully made similar changes, allowing you to share experiences and gather ideas.
These resources can make the process smoother and guarantee your grab bars are safe and effective.
Professional Installation Services
When you decide to install grab bars in your bathroom, seeking professional installation services can make all the difference. A licensed contractor guarantees your grab bars are securely mounted, adhering to safety standards.
They assess your bathroom space and recommend ideal grab bar placements, enhancing safety and accessibility.
Consider these options for professional help:
- Home improvement stores often offer installation services when you purchase grab bars.
- Local aging and disability resource centers can refer you to certified installers specializing in accessibility modifications.
- Many contractors provide free consultations to evaluate your needs.
- Hiring experienced professionals gives you peace of mind, knowing your installation meets all necessary standards.
Online Installation Videos
Finding the right resources can be essential for a successful grab bar installation, and online installation videos are a valuable tool in your DIY toolbox. These videos offer step-by-step visual guidance on positioning and mounting techniques, ensuring grab bar stability and compliance with ADA standards.
Here's a quick overview of what you might find:
| Video Source | Content Type | Benefits |
|---|---|---|
| YouTube DIY Channels | Detailed demonstrations | Avoid common mistakes |
| Home Improvement Stores | Tutorials by professionals | Tools required and tips |
| Manufacturer Websites | Product-specific guides | User reviews for insights |
| Community Forums | Installer experiences | Anticipate challenges |
Utilizing these resources can greatly enhance your installation experience!
Local Home Improvement Workshops
Online installation videos can be a great starting point, but local home improvement workshops offer invaluable hands-on experience and expert guidance for installing grab bars.
Here's why you should attend these workshops:
- Free classes at local home improvement stores on grab bar installation.
- Expert advice from knowledgeable staff who understand safety modifications.
- Workshops at community centers or senior centers focused on elder care and home safety.
- Supplement your learning with online resources for visual step-by-step instructions.
Frequently Asked Questions
How Should Bathroom Grab Bars Be Installed?
To install bathroom grab bars, start by locating the wall studs for maximum stability.
Position the bars 33 to 36 inches above the floor, ensuring there's a 1 ½ inch gap from the wall for a secure grip.
Use stainless steel screws to fasten, avoiding plastic anchors unless absolutely necessary.
If you're dealing with tiles, pre-drill with a glass-and-tile bit and caulk the back of the flange to prevent water damage.
Test stability before use.
What Are Two Requirements When Installing Grab Rails in a Bathroom?
Imagine you're in a cozy 1950s bathroom, and you want safety while stepping in and out of the tub.
When installing grab rails, make sure they're anchored securely to wall studs or use strong anchors if needed. They should also sit between 33 to 36 inches off the ground for easy reach.
Keeping a 1 ½ inch space between the bar and wall is essential for a comfortable grip, ensuring you stay safe.
What Is the Code for Installing Grab Bars in the Shower?
When you're installing grab bars in the shower, you need to follow specific codes to guarantee safety.
The bars must support at least 250 pounds and should be mounted horizontally between 33 to 36 inches from the floor.
Maintain a clearance of at least 1 ½ inches from the wall for a secure grip.
If you're using a roll-in shower, install three bars, keeping them no more than 6 inches apart from the walls.
Do Grab Bars Need to Be Installed in Studs?
Yes, grab bars should be installed in studs for maximum safety and stability.
You'll want to locate and mark the center of the wall studs using a stud finder. This guarantees the grab bars can support the required weight of at least 250 pounds.
If you can't access the studs, consider using toggle bolts or specialized anchors to provide adequate support.
Proper installation minimizes the risk of damage and enhances overall safety.
Conclusion
Installing grab bars in your bathroom is like planting sturdy roots in a garden; they provide stability and support when you need it most. By following this guide, you've turned your space into a safe haven, ensuring that every step you take is secure. Just like a well-tended garden flourishes, your efforts will nurture confidence and independence. So go ahead, embrace this transformation, and enjoy the peace of mind that comes with a safer home.