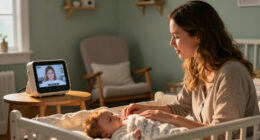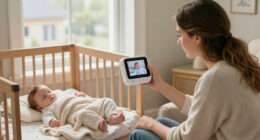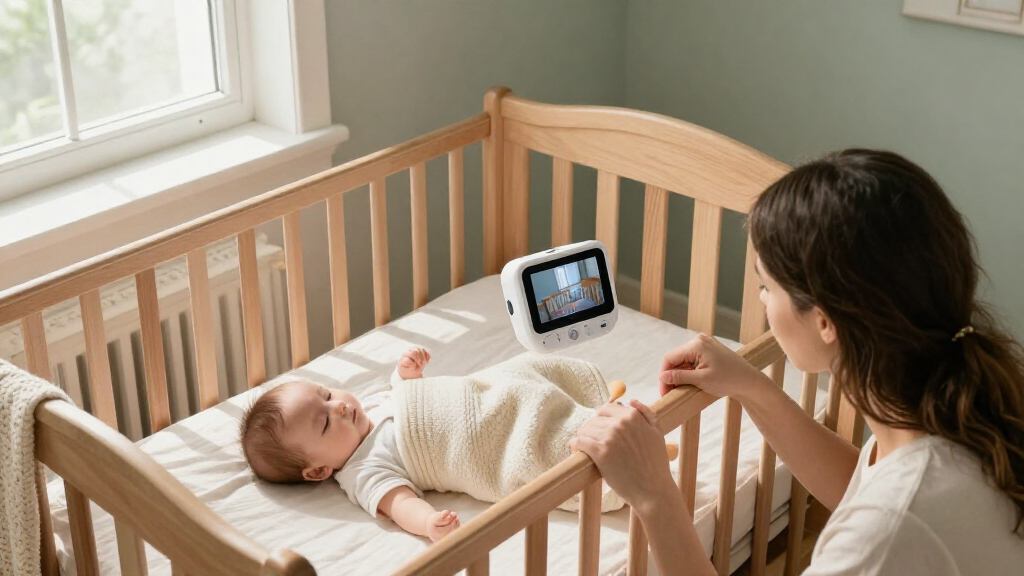
Set up a video baby monitor by powering its camera and display or phone app, placing the camera safely, and checking the picture, sound, and alerts from the rooms where you will use them. This guide is for caregivers setting up a monitor for the first time or moving one to a new room. Allow 30-60 minutes, including time to read the product instructions and test the connection.

Turn the school run and nap time into listening time
- Thousands of audiobooks, podcasts and originals
- Listen on your phone, tablet or Echo — also offline
- Cancel anytime
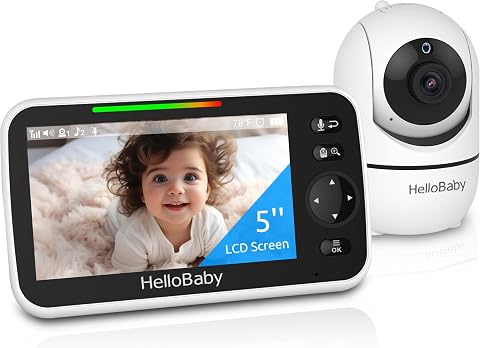
HelloBaby No WiFi Baby Monitor Camera and Audio HB6550, 5" Video Screen
- ✔ Display: 5-inch color screen
- ✔ Connection: 2.4 GHz FHSS; no Wi-Fi
- ✔ Camera movement: 355° pan, 120° tilt

GoodBaby 5-Inch Baby Monitor with Camera and Audio, No Wi-Fi
- ✔ Display: 5-inch IPS screen
- ✔ Video resolution: 480p
- ✔ Connection: 2.4 GHz FHSS; no Wi-Fi

HelloBaby HB6550Plus 6-Inch No-WiFi Video Baby Monitor
- ✔ Display: Described as 6 inches in title and 5.5 inches in product information
- ✔ Connection: 2.4 GHz FHSS; no Wi-Fi
- ✔ Camera movement: 355° pan, 120° tilt
Difficulty: Beginner | Time: 30-60 minutes
What You’ll Need
Tools & Materials:
- Video baby monitor camera and its parent unit, or a compatible phone with the monitor app
- Power adapters supplied with the monitor
- Stable shelf or manufacturer-approved wall mount
- Measuring tape, if mounting the camera
Knowledge:
- Basic ability to use a phone app or the monitor’s parent unit
- Ability to follow the model-specific pairing and mounting instructions
Check the monitor’s manual for approved mounting hardware, minimum placement distance, operating range, and Wi-Fi requirements. Charge the parent unit or phone before setup. Keep all cords and camera parts away from the crib and the baby’s reach.
HelloBaby No WiFi Baby Monitor Camera and Audio HB6550, 5" Video Screen
The HelloBaby HB6550 earns the top spot by balancing the features that matter most in a straightforward video setup. Its 5-inch display is paired with remote 355-degree pan and 120-degree tilt, so we can adjust the view from the parent unit instead of repositioning the camera every time the crib or room layout changes. Two-times digital zoom can help us inspect the image more closely, though it does not change the camera’s stated resolution.Like the GoodBaby, this model uses a 2.4 GHz FHSS connection without Wi-Fi, and includes infrared night vision, two-way audio, temperature monitoring, and eight lullabies. Its clearest advantage over both rivals is camera expansion: it supports up to four cameras, compared with two on the HB6550Plus. That gives it more room to adapt if we need to monitor multiple rooms. The stated 30-hour battery life is appealing for portability, but the product details do not specify a particular viewing mode for that figure. We should also account for the stated line-of-sight limitation on maximum range and decide whether its 5-inch screen is large enough for us.
Pros:
- Remote pan and tilt with 2× digital zoom
- Supports expansion to up to four cameras
- No-Wi-Fi FHSS connection with infrared night vision
- Lists up to 30 hours of rechargeable monitor battery life
Cons:
- The 5-inch display may feel small beside the Plus model’s larger stated screen
- Maximum range depends on clear line of sight
- The battery-life claim does not specify the viewing mode
Best for: Families who want a no-Wi-Fi dedicated monitor with remote camera control and the option to add up to four cameras.
Not ideal for: Buyers who prioritize a larger display, need a clearly specified screen-on battery runtime, or expect reliable maximum range through walls and obstructions.
Bottom line: We recommend the HB6550 as the most adaptable all-round choice, especially if adding cameras matters more than having the largest display.
“We recommend the HB6550 as the most adaptable all-round choice, especially if adding cameras matters more than having the largest display.”
GoodBaby 5-Inch Baby Monitor with Camera and Audio, No Wi-Fi
The GoodBaby SM663 is the practical alternative for families who want feeding reminders alongside the usual video-monitor features. Its feeding timer alarm gives it a routine-focused advantage over the original HB6550, which lists lullabies and temperature monitoring but no feeding timer. Camera movement is comparable across the lineup: remote 355-degree pan, 120-degree tilt, and two-times zoom let us adjust framing from the parent display.Its stated 480p video resolution is useful context when comparing specs, though it is not a reason to expect a highly detailed image. GoodBaby also gives more specific battery conditions than the other listings: up to 30 hours in VOX mode, but up to 10 hours with the screen on. That makes it easier for us to plan around how we actually watch, and it is a meaningful limitation for parents who keep live video visible for long stretches. The camera needs corded power, as does the Plus camera, so the battery-powered parent unit does not make the whole system cordless. Compared with the HB6550, GoodBaby offers clearer runtime detail but less camera expansion information; compared with the Plus, it trades a larger stated screen for a more explicit resolution and battery specification.
Pros:
- Feeding timer alarm adds a useful routine reminder
- Remote pan, tilt, and 2× zoom
- No-Wi-Fi FHSS connection with two-way audio
- Battery life is stated separately for VOX and screen-on use
Cons:
- Video resolution is listed as 480p
- Up to 10 hours of battery life is stated with the screen on
- Camera requires corded electric power
Best for: Caregivers who want a dedicated no-Wi-Fi monitor with a feeding timer and can use VOX mode to extend parent-unit battery life.
Not ideal for: Those who want long continuous screen-on viewing, a higher-resolution listed feed, or a camera setup that does not need a power cord.
Bottom line: Choose the GoodBaby if its feeding timer and clearly described VOX runtime suit your routine better than a larger screen or broader camera expansion.
“Choose the GoodBaby if its feeding timer and clearly described VOX runtime suit your routine better than a larger screen or broader camera expansion.”
HelloBaby HB6550Plus 6-Inch No-WiFi Video Baby Monitor
The HelloBaby HB6550Plus is the screen-first option in this group. Its title describes a 6-inch display, while the product information also calls it 5.5 inches; that inconsistency makes it hard to compare precisely with the 5-inch HB6550 and GoodBaby screens. Even so, buyers who want a larger viewing area may prefer the Plus, especially since it combines remote pan and tilt with an audio-only mode. Switching to audio can be useful when we do not need the picture constantly and want to conserve the parent display’s battery.The Plus shares the lineup’s no-Wi-Fi FHSS connection, infrared night vision, two-way audio, temperature alerts, and eight lullabies. Its stated battery range of 18 to 33 hours is broad, so it should not be read as a single predictable runtime; mode and usage matter. It also includes a feeding timer and sound-level LED indicator, but supports only up to two cameras. That is half the HB6550’s listed expansion capacity. We would favor the Plus over the GoodBaby when display size and audio-only listening matter more than a specifically stated video resolution or feeding reminders; the specification inconsistency is the main reason it ranks third rather than first.
Pros:
- Larger display is stated in the title than on the other two models
- Audio-only mode and sound-level LED indicator
- Remote pan and tilt with infrared night vision
- Includes temperature alerts, lullabies, and a feeding timer
Cons:
- Display is listed as both 6 inches and 5.5 inches
- Supports up to two cameras, fewer than the original HB6550
- Stated battery range of 18–33 hours is broad
Best for: Families who favor a potentially larger dedicated screen and want audio-only monitoring as an option.
Not ideal for: Buyers who need confirmed screen dimensions, expect to add more than two cameras, or want a narrowly defined battery-life figure.
Bottom line: The HB6550Plus is the better fit when a larger screen and audio-only mode lead our priorities, provided we can accept unclear screen sizing and limited camera expansion.
“The HB6550Plus is the better fit when a larger screen and audio-only mode lead our priorities, provided we can accept unclear screen sizing and limited camera expansion.”
As an Amazon Associate we earn from qualifying purchases.
Before You Start
Plan a safe camera position before powering the monitor. Place the camera on a stable surface or mount it as the manufacturer directs. Keep the camera, mount, and power cord outside the crib and beyond your baby’s reach. Secure and route cords so they cannot hang near the crib, and do not put a cord under a mattress or rug. If you cannot place a cord safely, choose another camera location or ask a qualified installer for help.
Use the monitor as an aid to supervision, not as a replacement for checking on your baby. Follow safe-sleep guidance and the camera maker’s instructions. If your model connects to Wi-Fi, have the network name and password ready.
Step-by-Step Instructions
Step 1: Read the model-specific setup instructions
Find the manual or setup card for your exact monitor model. Check how to power it, pair the camera with its display or app, adjust the camera angle, and install any wall mount. Note the maker’s stated operating range and whether the camera needs Wi-Fi, a parent unit, or both. Use only the supplied adapter or a replacement the maker approves.
Tip: Models differ: some pair automatically, while others need a pairing button or app account.
Check: You know which components are required and have the correct power and pairing instructions.
Step 2: Choose a safe camera location
Select a position that gives a clear view of the sleep space without placing the camera or any cord in or near the crib. Set the camera on a sturdy surface or use the manufacturer’s mounting hardware. If mounting it, follow the manual’s height, distance, and anchoring instructions. Route the cord along a wall and secure it so it cannot dangle, be pulled, or become accessible from the crib.
Tip: Do not attach the camera to the crib or place it on a surface the baby could reach by climbing or standing.
Check: The camera is stable, the sleep space is visible, and the camera and cord are outside the baby’s reach.
Step 3: Power the camera and viewing device
Connect the camera to power using the supplied adapter and switch it on. Charge or connect the parent unit, or install the manufacturer’s app on a compatible phone. For app-based models, connect your phone to the Wi-Fi network the camera will use and confirm that the network meets the model’s requirements. Keep the adapter and excess cord secured away from the crib.
Tip: If the camera uses batteries, install the specified type and check the manual for expected battery life.
Check: The camera shows a power indicator or startup screen, and the viewing device is ready to pair.
Step 4: Pair the camera with the display or app
Follow the manual’s pairing sequence. On a parent unit, select the camera-pairing option and press the camera’s pairing button when prompted. For an app-based model, follow the app’s steps to add the camera and enter the Wi-Fi details. Keep the camera close to the parent unit or router during initial pairing, then move it to the planned position after setup if needed.
Tip: Enter the Wi-Fi password carefully; a wrong character can prevent setup from completing.
Check: The display or app shows a live camera image rather than a pairing prompt or error.
Step 5: Aim and adjust the camera view
Use the live image to aim the camera at the sleep space. Adjust the angle so you can see the area you need without moving the camera into an unsafe position. If the image is too dark, check whether the monitor’s night-vision mode switches on in a dim room. Avoid placing the camera where direct light creates glare or where nearby objects block the view.
Tip: Do not rely on digital zoom alone to check a view; confirm that the camera itself remains securely positioned.
Check: The image is steady and clear enough to see the intended area in both normal room light and low light.
Step 6: Set sound, alerts, and privacy options
Adjust the speaker volume and microphone sensitivity to a level you can hear from the rooms where you will be. Turn on only the alerts you need, such as sound, motion, or connection-loss notifications, and check how each alert appears. For Wi-Fi models, set a unique account password and use the manufacturer’s available security settings. Share access only with caregivers who need it.
Tip: Very high sensitivity can create frequent alerts from ordinary room sounds; tune it in small increments.
Check: You can hear a test sound or receive the selected alert, and the app or unit shows the intended privacy and account settings.
Step 7: Test the monitor from your usual locations
Take the parent unit or phone to the places where you expect to use it. Check the picture and audio at the farthest point in the home, with doors in their usual positions. For Wi-Fi models, confirm that the app reconnects if your phone briefly changes rooms or locks. If the manufacturer provides a connection or alert test, run it now.
Tip: Walls, floors, appliances, and other wireless devices can reduce range; the stated maximum range may assume open space.
Check: The image and sound remain available in the places you need them, and the selected alerts work.
Step 8: Recheck placement and secure the setup
Look over the full camera installation once more. Confirm that the camera cannot tip, the mount is secure, and no cord, adapter, or loose part can reach the crib. Keep the parent unit or phone in a safe, convenient place where you can hear it. Save the manual and note how to mute alerts, change the camera view, and reconnect the device.
Tip: Repeat this check after moving furniture, changing the crib layout, or adjusting the camera.
Check: The monitor works from your normal location and every part of the camera setup remains out of the baby’s reach.
Common Mistakes to Avoid
- Placing the camera or power cord within reach of the crib. — Choose the camera position before connecting power, follow the mounting instructions, and secure the cord along a route the baby cannot reach.
- Assuming the monitor’s advertised range will work throughout the home. — Test the live view and sound from the rooms you will use, with doors and furniture in their usual positions.
- Setting sound sensitivity too high or muting the parent unit by accident. — Test alerts with a normal room sound and check the volume and mute status before relying on the monitor.
- Sharing app access or leaving the default account password in place. — Set a unique password, use available security options, and give access only to the caregivers who need it.
Troubleshooting
Problem: The camera does not appear in the app or parent unit.
Solution: Confirm that the camera and viewing device are powered, then repeat the model’s pairing steps. For Wi-Fi models, check the network name and password and verify that the phone and camera meet the maker’s network requirements.
Problem: The picture freezes or the connection drops in another room.
Solution: Move the viewing device closer to the camera or router and test again. Relocate the camera only if you can keep it safely mounted and its cord out of reach. Check the manual for range limits and network guidance.
Problem: The picture is dark, washed out, or blocked.
Solution: Check the camera angle, remove objects blocking the lens, and reduce glare from lamps or windows. In a dark room, confirm that night vision is enabled or operating as described in the manual.
Problem: Alerts are missing or keep sounding unnecessarily.
Solution: Check that the parent unit or phone is not muted, that notifications are allowed, and that the monitor is connected. Adjust sensitivity gradually, then test an alert again.
What Success Looks Like
The monitor shows a steady view of the intended sleep space, provides sound you can hear from your usual locations, and sends the alerts you selected. The connection works at the locations where you plan to use the display. The camera, mount, adapters, and cords are stable and outside the baby’s reach. You can identify how to check power, adjust volume, and reconnect the monitor if needed.
Next Steps
Check the camera position and cord routing whenever you move the crib, furniture, or monitor. Keep the camera lens clean according to the manual, charge the parent unit as directed, and install app or firmware updates through the manufacturer’s instructions. Recheck the connection after changing your Wi-Fi router or password. If a camera mount loosens, a cord becomes accessible, or the monitor repeatedly fails, stop using that setup until you can correct the placement or contact the manufacturer.
Frequently Asked Questions
Where should I put a video baby monitor camera?
Use a stable surface or the manufacturer’s approved mount in a position that shows the sleep space. Keep the camera, mount, and cord outside the crib and beyond the baby’s reach. Follow the model’s placement and mounting instructions.
Can I use a video baby monitor without Wi-Fi?
Some monitors use a dedicated parent unit and do not require Wi-Fi; others rely on an app and home network. Check the exact model’s requirements before setup.
Why does my monitor lose connection in another room?
Walls, floors, distance, and wireless interference can weaken a signal. Test the monitor at your intended viewing locations and follow the maker’s range or network guidance.
How do I know if the night-vision view works?
With the room dim, check the live image and confirm that the intended area remains visible. If it does not, consult the manual for night-vision behavior and adjust the angle or reduce glare while keeping the camera safely placed.
Does a video monitor replace checking on my baby?
No. Use it as a way to view and hear from another room, and continue to supervise and check on your baby as needed. Follow current safe-sleep guidance and your healthcare professional’s advice.